Spray Painted Bathroom Counter

Hey there, friends! As I mentioned here, I plan to move a few of my more popular posts from Designing Dawn over here to AD Aesthetic as we go along, so that they are easier to reference. This one in particular was on my list because it was the kickoff for my master bathroom (and bedroom) makeover, and I like the idea of having all the steps in the same place as we go along. So here you go! Reposted from DD— how I painted another counter... this time with stone spray paint. That's right. I spray painted my bathroom counter. Spoiler: I LOVE IT!!!
This post contains some affiliate links for your convenience. Click here to read our full disclosure policy.
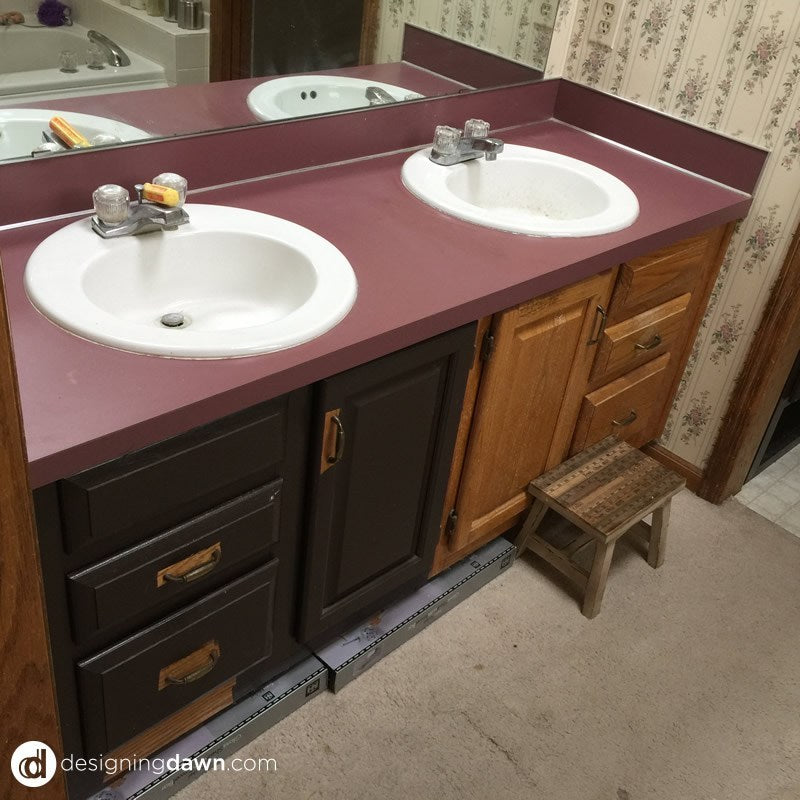
Today's post is definitely not going to be a pinterest worthy before/after type of post, but I AM pretty excited about it, nonetheless. Because we've FINALLY started on the one room in the house we had not touched since we moved in. (And it was bad.) Our master bathroom makeover has begun. I'm calling this a makeover and not a renovation, because, as much as I'd love to demo the whole thing and start from scratch... see limited funds comments above. So for now at least, I've decided to make this ugly duckling into the best little swan it can be, and that means working with what we've got. So let's get going already! Here's what the bathroom has looked like for the past SIX years (no I can't believe it's been that long... now please prepare your eyes):


I know. Not cute. I feel slightly defensive about the fact that this room is still in this state, but I will say that we intentionally saved it for last because it is one room that (almost) no one but us ever sees since it's tucked in the corner of our master bedroom on the second floor of the house. That being said, it is certainly not acceptable and it's time for a change in the worst way possible. At one point a few years ago, I started painting the vanity the same chocolate-brown as in the guest bathroom, but then changed my mind half way through and never touched it again, so it has looked extra not-awesome for a while now. Don't be jealous of my sweet bathroom carpet.

The layout of this room is very long and narrow. It makes it hard to capture in photos, but here is a (not to scale) floor-plan I put together to give you a better idea of what we're working with.

As you might imagine, I've been thinking about this bathroom quite a bit over the past 6 years of using it in this state. My grand plan would involve tearing out the wall between the tub and shower and framing out the shower with glass. I think this would give the room a much more open feeling, making it seem twice as spacious and not like the strange tunnel it is now. Currently, the wall separating the shower and tub is hallow, which we know because it contains a sliding pocket door. This is good news because it means tearing out that wall wouldn't involve moving any pluming. So that is something we're still considering and trying to budget for down the road, but in the meantime, I think there are a ton of smaller, and relatively inexpensive, projects that could make the room feel much less 1995, which is the goal. Here are my plans in step-by-step style:
- Update dated counter top
- Paint vanity
- Update vanity hardware
- New faucets
- Remove wallpaper
- New lighting fixtures
- New mirrors??
- Paint walls
- Add storage (there is NONE in here!)
- Remove carpet/vinyl and add new tile floors
- Add modern tile accents around tub, shower, and vanity
- Install new hardware (towel bars, shower curtain, etc.)
- Fix shower so it's usable (I'm going to gloss over this for now, but will explain this completely separate issue some other time.. uhg.)
- Final decor touches
Does that sound like a lot? It feels like a lot. But let's just take it step by step and expect to be redoing this bathroom for the next two-three years, ok? On board? Good. SO... on to item number one. That magenta laminate counter. Wow. You know I'm not one to shy away from a good counter DIY. My most popular post by far is the one where I painted my kitchen counters. I have since given the same treatment to my guest bathroom counter, and so far both have held up pretty great (read my four-year update and FAQs here), so I did not hesitate when deciding to do the same thing in here, with a bit of a twist this time. In this room I actually use the counter a LOT so the first priority is making sure they hold up and look good. I've had some slight issues with heat discoloring the light counters in my kitchen, and since the majority of my vanity use includes heat styling tools, I decided to go dark on the counters. My second goal was to make them look as natural as possible, and I really wanted a stone look. I found this awesome stone textured spray paint, (affiliate link) and you guys, it was perfect!!

Step one: Prep
I purchased my supplies and taped off the entire area around the counter, making sure to cover the mirror, sinks, and vanity. I know spray paint can get pretty messy, and did not want to deal with over-spray. I should say that part of my plan to make this room look more modern involved removing the very cheap and fake looking back-splash. I was not thrilled with how it turned out in either the kitchen or the guest bath, so this time I just pried it off with a crow bar before starting. I plan to patch the wall and add decorative tile around there later on, so for now, try to overlook the gross yellow-glue look all around the counter. I promise it will be worth it later on. Oh and ignore that screwdriver on the left faucet too. It's been leaking and I had to wedge that in there to stop it until we replace the faucets. #glamorous


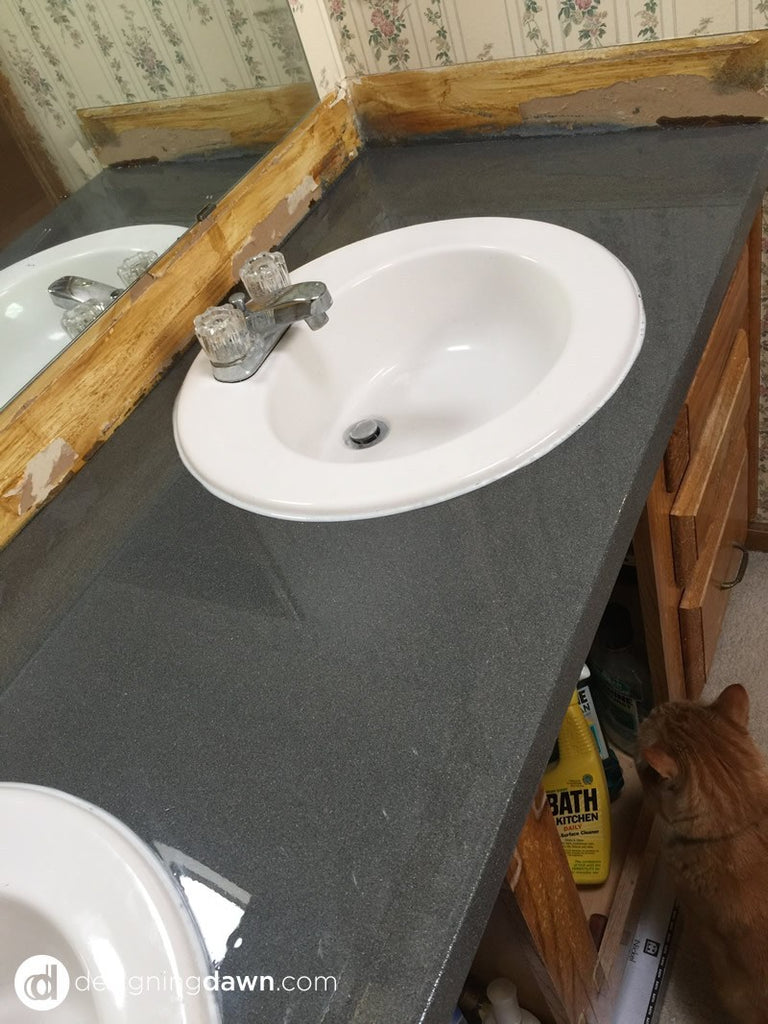
Step two: Paint
After everything was taped off, I wiped down the counter top to make sure it was clean and ready for paint. I didn't bother to sand it or anything (#lazy). Then I got to business with the spray paint. It ended up taking me two cans to get full coverage on the counter, but I am so happy with the look. Here is the counter after the paint job. I'm not sure if you can tell from the photos, but it had a definite rough stone-like texture to it. I've actually seen a few tutorials on using this for counters where they just left it at this stage, or maybe added a poly coat and called it good. I think I, personally, would be driven crazy by the texture and inability to just wipe it down easily. I can't imagine how stuck on toothpaste would ever get completely cleaned off! That being said, if you like the texture and can make it work for you, more power to ya! Stop here and call it a job well done. ;)


Step three: Gloss Coat
I can't tell you enough how much I love EnviroTex Lite. As I mentioned, I've used this stuff three times now and it gives the most AMAZING glossy finish, and really is relatively simple to apply. I bought one 32oz box for this counter and it was plenty. You just mix together the two bottles in the box according to the directions, and pour it on, spreading it all over the counter with a small foam brush. As it dries, you can either use a torch to pop any bubbles that surface (there should be several if you mixed it correctly) or just grab a drinking straw and use it to aim as you blow lightly to pop the bubbles. It's super easy.

I learned in my guest bath adventures that if you don't add a coat of poly between the paint and the Envirotex step, your counter will darken quite a bit. In this case, I wanted it to darken up slightly, so I let it do its stuff and turned out just as I had hoped it would.


Step four: Let it dry and enjoy your new counter!
After applying the Envirotex, I just kept an eye on it every few minutes until it was set up (it sets up fairly quickly— about 20 minutes, and is hard within 3 hours, but I'd recommend not using the counter for a few days to let it cure completely). There are usually a few drips down the front, so I just smooth them out with my foam brush as they appear. Once it was all dry, I scraped off any residue on the sink basin with a razor blade and caulked around both sinks to give a nice clean finish. And finally, here is the finished counter top!
As mentioned, I know the counter by itself, while sitting on a gross half-painted vanity with glue residue around the back-splash, is not the most dramatic or pinterest worthy makeover, but I'm already 80% done painting the vanity and adding new hardware and it looks SO MUCH BETTER. You can almost overlook the floral wallpaper and gross carpet! Ha. I'll share that paint job with you as soon as it's done, but for now, the first step in the master bath makeover has been taken! Finally!

6 comments
How long did the total process take. I have 3 I’d like to refinish. Afraid I’ll mess it up then I’m in alot of trouble. No money to waste.
Thank you kindly
It turned out beautifully totally Pinterest worthy, seeing that Pinterest is where I found this!! Can’t wait to see the rest of the make-over!
Unbelievable awesome.
Thank you!!
Curious how this held up since the original 2012 post?
when did you do this and how is it holding up?
looks great! any ideas to do sinks?
Once applying the clear coat, did that make it a smooth finish or still textured?